前置环境
K8S v1.27.3,单节点 control plane,三节点 worker。
如果之前在集群中安装过 Rook Ceph,可参考 https://rook.io/docs/rook/v1.11/Getting-Started/ceph-teardown/#delete-the-data-on-hosts 进行清理。
额外需要注意的是 /var/lib/rook 在所有 node 节点上的删除。
另外需要在每个 node 节点上提供一个独立磁盘,我这里使用的是 /dev/sdb,每个节点划分了 40GB。注意初始化 ext4 完毕后不能做 mount。可参考:https://help.aliyun.com/document_detail/25426.html 。
集群模式安装
git clone --single-branch --branch v1.12.0 https://github.com/rook/rook.git
cd rook/deploy/examples
kubectl create -f crds.yaml -f common.yaml -f operator.yaml
kubectl create -f cluster.yaml
kubectl create -f toolbox.yaml
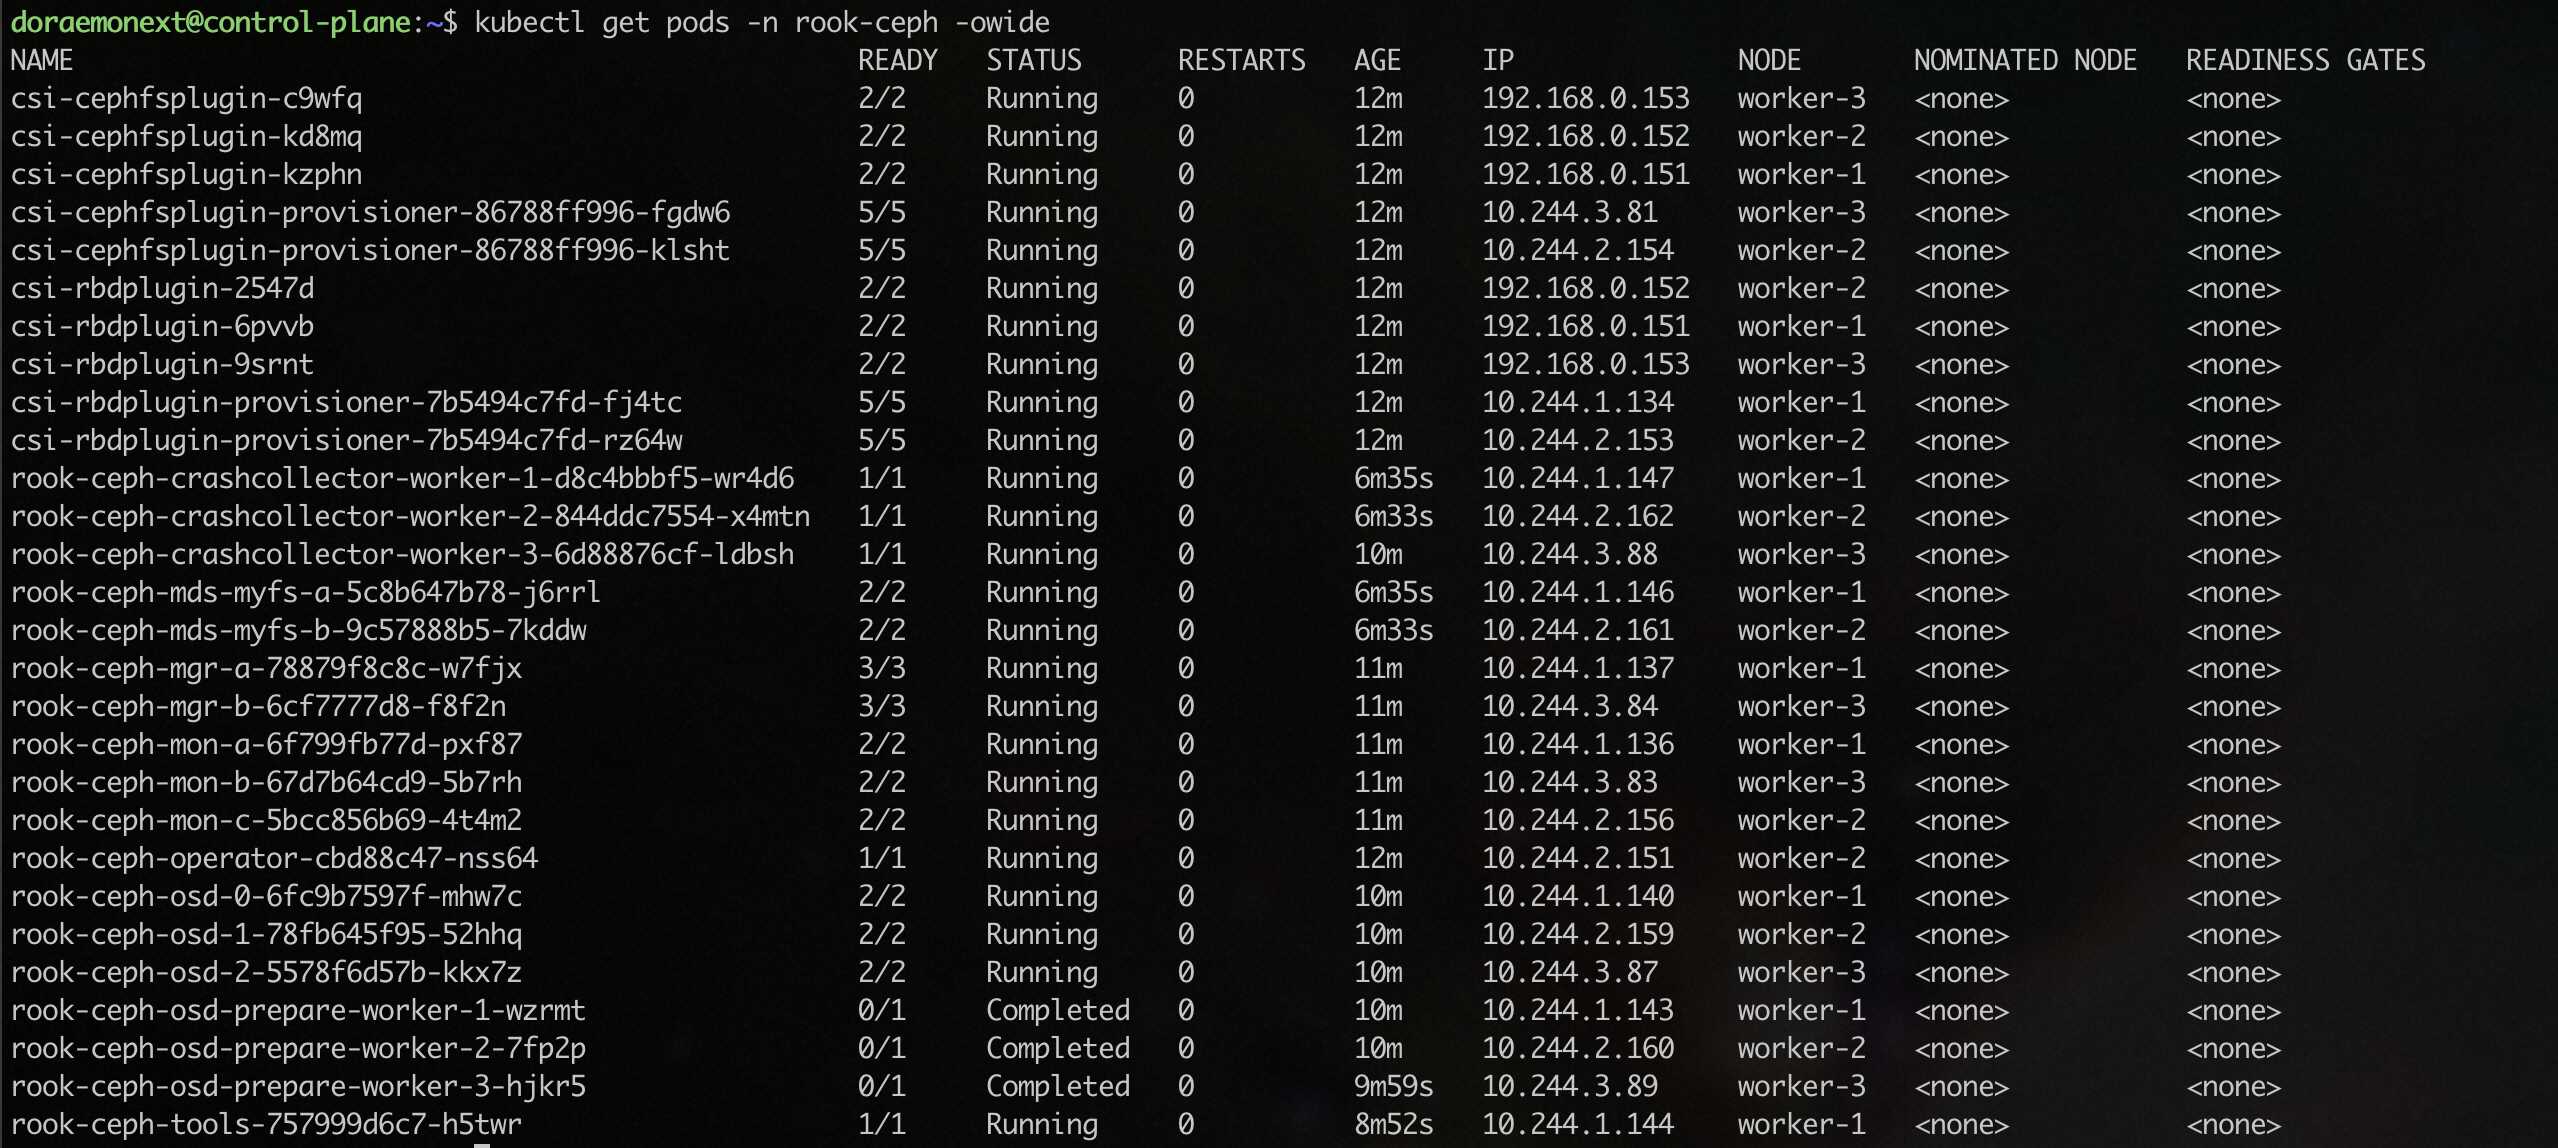
部署终态如下:
检查集群状态:
kubectl -n rook-ceph exec -it deploy/rook-ceph-tools -- bash
执行 ceph status,如果能看到下面的输出即可(health: HEALTH_OK):

安装 cephfs (共享文件系统)
主要用于各个 Pod 之间共享文件存储。比如 WordPress 共用一个插件存储目录等。
cd rook/deploy/examples
kubectl create -f filesystem.yaml
kubectl create -f csi/cephfs/storageclass.yaml
确认 ceph status 中已经出现了 mds: 1/1 daemons up, 1 hot standby 字样。
然后设置默认 storageclass:
kubectl patch storageclass rook-cephfs -p '{"metadata": {"annotations":{"storageclass.kubernetes.io/is-default-class":"true"}}}'
最后确认 kubectl get storageclass 如下:
